原文链接: using-docker-container
The Espressif docker image has been released here, but for idf.py flash and idf.py monitor to work in the container the serial ports should be configured to be passed to WSL from host Windows machine.
In this tutorial will show you how to develop your projects based on Visual Studio Code + ESP-IDF extension + ESP-IDF Docker Image to execute all ESP-IDF extension features.
Required tools
you need to install the following tools before starting our projects:
- Ubuntu 20.04 on Windows
- Visual Studio Code
- usbipd-win
- Docker Desktop For Windows
Other tools are defined in Dockefile and will be part of the executed container.
Docker Desktop
Docker Desktop is an application for MacOS and Windows machines for the building and sharing of containerized applications. For more details, the user can refer to here, but the role of docker here is to import the ESP-IDF Docker Image and manage it, such as start,restart,close etc.
NOTE: the default installing path of docker is C disk, so please move to other disks with
mklinkcommands if the space size of C disk is not enough.
Ubuntu 20.04 on Windows
WSL is present starting from Windows 10 OS, so we can check the WSL list with the powershell command prompt, as below
wsl -l -o

so to install WSL on windows, please type in the following command:
wsl --install --distribution Ubuntu-20.04
where Ubuntu-20.04 is for your information.
usbipd-win
To access the USB,serial,JTAG devices which are from the local windows, this tools must be installed, else it is impossible to download,monitor and debug on IDF docker image side. the way to install it, it is also same as windows applications, so it will not be described in detail here.
configuration
we still need to do a bit configurations after installing the four tools above:
Ubuntu 20.04 on Windows
the default version of WSL is 1 after installing, it needs to upgrade to version2 and then set it as the default distribution with the following steps:
- check the current WSL version
wsl -l -v
- please upgrade to version 2, if not
wsl --set-version Ubuntu-20.04 2 - set the distribution, as below:
wsl -s Ubuntu 20.04
at last, to check if the commands have taken effect with wsl --status command.

Docker Desktop For Windows
As the distribution Ubuntu 20.04 has been updated to version 2, so it needs to modify accordingly from docker side and choose the Ubuntu 20.04 as the default WSL integration as well.

usbipd
From windows side this tool should be already configured. However usbipd still need to be installed on the WSL, that is, open the WSL from Windows menu and then type in the following the commands separately:
sudo apt install linux-tools-virtual hwdata
sudo update-alternatives --install /usr/local/bin/usbip usbip `ls /usr/lib/linux-tools/*/usbip | tail -n1` 20
If any errors are found, try updating apt-get packages first.
apt-get update
NOTE: IF you are using a container made with the Dockerfile from this extension
.devcontainergenerated directory (when you create a project using theESP-IDF: New Project,ESP-IDF: Add docker container configurationorESP-IDF: Show Examplescommands).
with this the local Windows and WSL are all installed. To check usbipd tool is working well on both side, please follow the following steps:
- open PowerShell command prompt with administrator right and then type in the command
usbipd wsl list:
as you can see, all USB devices from Windows have been found and not attached sate. - to access the specified device from local Windows on WSL, it needs to bind this device. Open PowerShell command prompt with administrator rights and then type in the command
usbipd bind -b <BUSID>:
Note: this command needs to be used only one time,unless the computer has restarted. 1-1 is the device's bus id I would like to bind. - after binding, please attach the specified device to WSL with
usbipd wsl attach --busid 1-1command in the powershell command prompt.

- At last, let us check if it works well on both side and type in
dmesg | tailcommand on WSL side.
as we can see above, 1-1 device has been attached tottyACM0, that means WSL can access the 1-1 USB device now.
Visual Studio Code
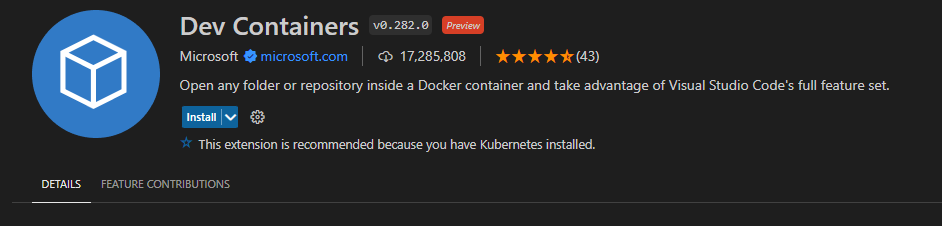
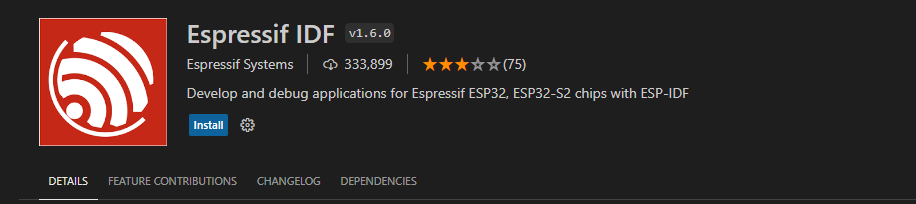
To connect to the ESIDF docker image, install the Dev Containers、Remote Development and ESP-IDF extensions, as below:

Practice
After all previous steps have taken effect, the WSL or docker container should be ready to use. Here is an example to show you how to utilize these tools.
example project with docker container
Using blink and hello_world projects as examples, If you have more example projects, you can put them in the same folder and mount them together in the IDF Docker image; otherwise, it will take your much more space size on your disk as you need to create one container for each example project, that is not a good solution.

as seen from snapshot above, blink and hello_world example projects have been put in the same folder and we only need to open this folder with vscode:

some readers may see that there is a .devcontainer folder in the example_project folder, which is not included by default; this is generated by using the ESP-IDF extension of Visual Studio Code to create and configure the IDF docker image for container development.
If the user readers also need to generate their own .devcontainer folder content, as follows:
- open example project with vscode and then press
F1 - In the pop-up dialog box, search for the
ESP-IDF: Add docker container configurationcommand .devcontainerfolder will be generated for the currently opened project.

For more information about devcontainer.json, please refer to the comments.
// For format details, see https://aka.ms/devcontainer.json. For config options, see the README at:
// https://github.com/microsoft/vscode-dev-containers/tree/v0.183.0/containers/ubuntu
{
  /* A name for the dev container displayed in the UI */
  "name": "ESP-IDF",
  /* container name when creating container */
  "image": "espressif/idf:latest",
  /* mount the local folder to /workspaces folder of docker image */
  "workspaceMount": "source=${localWorkspaceFolder},target=/workspaces,type=bind",
  /* the path of workspace folder, that means this folder will be opened after container is running
   */
  "workspaceFolder": "/workspaces/blink",
  /* mount the vscode extensions to the target path, and then they don't need to install again when rebuilding the container
   */
  "mounts": [
    "source=extensionCache,target=/root/.vscode-server/extensions,type=volume"
  ],
  /* follow the commands of Dockerfile to create the container
   */
  "build": {
    "dockerfile": "Dockerfile"
  },
  /* Machine specific settings that should be copied into the container
   */
  "settings": {
    "terminal.integrated.defaultProfile.linux": "bash",
    "idf.espIdfPath": "/opt/esp/idf",
    "idf.customExtraPaths": "",
    "idf.pythonBinPath": "/opt/esp/python_env/idf5.0_py3.8_env/bin/python",
    "idf.toolsPath": "/opt/esp",
    "idf.gitPath": "/usr/bin/git"
  },
  /* An array of extensions that should be installed into the container. */
  "extensions": ["ms-vscode.cpptools", "espressif.esp-idf-extension"],
  /* start the container with privileged mode, else the devices cannot be accessed on the docker image.
   */
  "runArgs": ["--privileged"]
}
At this point, all related configurations have been completed.
Create a container
Create a container and then start your development by clicking the >< green button at the bottom left of Visual Studio Code and select Open Folder in Container to start creating a container (It will be slightly slower, because to download the Docker image of ESP-IDF, you only need to download it once), and finally open the Blink example project; if you need to switch to another project, just change it from "workspaceFolder": "/workspaces/blink" to "workspaceFolder": "/workspaces/The name of the sample project you want to open", and then re-selectOpen Folder in Container, as follows:

at this moment, you can start to use the Blink example project for building, flashing, monitoring, debugging, etc.
Building the project
Here taking the esp32-c3 as an example, users only need to change the target device from esp32 to esp32-c3, as below:

next, start to build the example project, as below:

Flashing to your device
after building, we can use the following ways to download the firmware.
External USB-Serial
Based on the description above, users can follow the instructions usbipd section mentioned. here Silicon Labs CP210x USB to UART Bridge is taken as an example, it has been attached to docker image:

as you can see, this device has attached to ttyUSB0, so idf.port also need to change accordingly.

but, the container doesn't know the configuration has changed yet at this moment.

so users need to reopen the container, that is Reopen Folder Locally and then the new configuration wil be reloaded as well.

at last, click the flash button and start to download the firmware.

Internal USB-serial
Just as the external usb-serial, the only difference is the number attached. where the external usb-serial is ttyUSBx, while the internal usb-serial is ttyACMx.

USB-JTAG
Same as External USB-Serial and Internal USB-serial, but it needs to configure the following extra parameters:

the interface is the same as Internal USB-serial, that is ttyACMx:

debugging
After following USB-JTAG, press F5 to start to debug:

Precautions
- When the container is created for the first time, it will prompt that the
ESP-IDF extensioncannot be activated because it depends on the MicrosoftC++ toolsextension. You only need to reopen the container again. This is because the ESP-IDF extension is dependent on the C++ Tools extension being installed first. - If you want to debug on Windows, you need to unplug the USB cable and re-plug in it again, otherwise the corresponding USB port cannot be found in the Windows device manager.
- Docker Desktop For Windows needs to be opened and cannot be closed during container development.
%22%2F%3E%0A%20%20%20%20%3C%2Ffilter%3E%0A%20%20%3C%2Fdefs%3E%0A%20%20%3Crect%20width%3D%22800%22%20height%3D%22400%22%20fill%3D%22url(%23g)%22%2F%3E%0A%20%20%3Ctext%20x%3D%22400%22%20y%3D%22169.4%22%20text-anchor%3D%22middle%22%0A%20%20%20%20%20%20font-family%3D%22system-ui%2Csans-serif%22%20font-size%3D%2272%22%20font-weight%3D%22700%22%0A%20%20%20%20%20%20fill%3D%22rgba(255%2C255%2C255%2C0.92)%22%20filter%3D%22url(%23sh)%22%3EESP-IDF%3C%2Ftext%3E%0A%20%20%3Ctext%20x%3D%22400%22%20y%3D%22273.8%22%20text-anchor%3D%22middle%22%0A%20%20%20%20%20%20font-family%3D%22system-ui%2Csans-serif%22%20font-size%3D%2272%22%20font-weight%3D%22700%22%0A%20%20%20%20%20%20fill%3D%22rgba(255%2C255%2C255%2C0.92)%22%20filter%3D%22url(%23sh)%22%3E%E7%AE%80%E4%BB%8B%E5%8F%8A%E5%BC%80%E5%8F%91%E7%8E%AF%E5%A2%83%E6%90%AD%E5%BB%BA%3C%2Ftext%3E%0A%3C%2Fsvg%3E)
%22%2F%3E%0A%20%20%20%20%3C%2Ffilter%3E%0A%20%20%3C%2Fdefs%3E%0A%20%20%3Crect%20width%3D%22800%22%20height%3D%22400%22%20fill%3D%22url(%23g)%22%2F%3E%0A%20%20%3Ctext%20x%3D%22400%22%20y%3D%22135.6%22%20text-anchor%3D%22middle%22%0A%20%20%20%20%20%20font-family%3D%22system-ui%2Csans-serif%22%20font-size%3D%2256%22%20font-weight%3D%22700%22%0A%20%20%20%20%20%20fill%3D%22rgba(255%2C255%2C255%2C0.92)%22%20filter%3D%22url(%23sh)%22%3E%E5%BE%AE%E4%BF%A1%E5%88%97%E8%A1%A8%E7%94%9F%E6%88%90%E5%99%A8%EF%BD%9C%E4%B8%80%E9%94%AE%E7%94%9F%E6%88%90%3C%2Ftext%3E%0A%20%20%3Ctext%20x%3D%22400%22%20y%3D%22216.8%22%20text-anchor%3D%22middle%22%0A%20%20%20%20%20%20font-family%3D%22system-ui%2Csans-serif%22%20font-size%3D%2256%22%20font-weight%3D%22700%22%0A%20%20%20%20%20%20fill%3D%22rgba(255%2C255%2C255%2C0.92)%22%20filter%3D%22url(%23sh)%22%3E%E9%80%BC%E7%9C%9F%E7%9A%84%E5%BE%AE%E4%BF%A1%E8%81%8A%E5%A4%A9%E5%88%97%E8%A1%A8%E9%95%BF%E6%88%AA%E5%9B%BE%3C%2Ftext%3E%0A%20%20%3Ctext%20x%3D%22400%22%20y%3D%22298.0%22%20text-anchor%3D%22middle%22%0A%20%20%20%20%20%20font-family%3D%22system-ui%2Csans-serif%22%20font-size%3D%2256%22%20font-weight%3D%22700%22%0A%20%20%20%20%20%20fill%3D%22rgba(255%2C255%2C255%2C0.92)%22%20filter%3D%22url(%23sh)%22%3E%EF%BC%88%E5%9C%A8%E7%BA%BF%E4%BD%93%E9%AA%8C%20%2B%20%E5%BC%80%E6%BA%90%EF%BC%89%3C%2Ftext%3E%0A%3C%2Fsvg%3E)
%22%2F%3E%0A%20%20%20%20%3C%2Ffilter%3E%0A%20%20%3C%2Fdefs%3E%0A%20%20%3Crect%20width%3D%22800%22%20height%3D%22400%22%20fill%3D%22url(%23g)%22%2F%3E%0A%20%20%3Ctext%20x%3D%22400%22%20y%3D%22117.2%22%20text-anchor%3D%22middle%22%0A%20%20%20%20%20%20font-family%3D%22system-ui%2Csans-serif%22%20font-size%3D%2272%22%20font-weight%3D%22700%22%0A%20%20%20%20%20%20fill%3D%22rgba(255%2C255%2C255%2C0.92)%22%20filter%3D%22url(%23sh)%22%3E%E6%98%9F%E5%85%81%E6%B4%BE%20F103%3C%2Ftext%3E%0A%20%20%3Ctext%20x%3D%22400%22%20y%3D%22221.6%22%20text-anchor%3D%22middle%22%0A%20%20%20%20%20%20font-family%3D%22system-ui%2Csans-serif%22%20font-size%3D%2272%22%20font-weight%3D%22700%22%0A%20%20%20%20%20%20fill%3D%22rgba(255%2C255%2C255%2C0.92)%22%20filter%3D%22url(%23sh)%22%3E%E5%85%AC%E6%B5%8B%E6%B4%BB%E5%8A%A8%E5%9C%86%E6%BB%A1%E6%94%B6%E5%AE%98%EF%BC%81%3C%2Ftext%3E%0A%20%20%3Ctext%20x%3D%22400%22%20y%3D%22326.0%22%20text-anchor%3D%22middle%22%0A%20%20%20%20%20%20font-family%3D%22system-ui%2Csans-serif%22%20font-size%3D%2272%22%20font-weight%3D%22700%22%0A%20%20%20%20%20%20fill%3D%22rgba(255%2C255%2C255%2C0.92)%22%20filter%3D%22url(%23sh)%22%3E%E8%87%B4%E6%95%AC%E6%AF%8F%E4%B8%80%E4%BD%8D%E5%85%88%E8%A1%8C%E8%80%85%EF%BC%81%3C%2Ftext%3E%0A%3C%2Fsvg%3E)
%22%2F%3E%0A%20%20%20%20%3C%2Ffilter%3E%0A%20%20%3C%2Fdefs%3E%0A%20%20%3Crect%20width%3D%22800%22%20height%3D%22400%22%20fill%3D%22url(%23g)%22%2F%3E%0A%20%20%3Ctext%20x%3D%22400%22%20y%3D%22169.4%22%20text-anchor%3D%22middle%22%0A%20%20%20%20%20%20font-family%3D%22system-ui%2Csans-serif%22%20font-size%3D%2272%22%20font-weight%3D%22700%22%0A%20%20%20%20%20%20fill%3D%22rgba(255%2C255%2C255%2C0.92)%22%20filter%3D%22url(%23sh)%22%3EGit%3C%2Ftext%3E%0A%20%20%3Ctext%20x%3D%22400%22%20y%3D%22273.8%22%20text-anchor%3D%22middle%22%0A%20%20%20%20%20%20font-family%3D%22system-ui%2Csans-serif%22%20font-size%3D%2272%22%20font-weight%3D%22700%22%0A%20%20%20%20%20%20fill%3D%22rgba(255%2C255%2C255%2C0.92)%22%20filter%3D%22url(%23sh)%22%3E%E5%AE%89%E8%A3%85%E4%B8%8E%E4%BD%BF%E7%94%A8%E5%85%A5%E9%97%A8%E6%95%99%E7%A8%8B%3C%2Ftext%3E%0A%3C%2Fsvg%3E)
%22%2F%3E%0A%20%20%20%20%3C%2Ffilter%3E%0A%20%20%3C%2Fdefs%3E%0A%20%20%3Crect%20width%3D%22800%22%20height%3D%22400%22%20fill%3D%22url(%23g)%22%2F%3E%0A%20%20%3Ctext%20x%3D%22400%22%20y%3D%2295.0%22%20text-anchor%3D%22middle%22%0A%20%20%20%20%20%20font-family%3D%22system-ui%2Csans-serif%22%20font-size%3D%2256%22%20font-weight%3D%22700%22%0A%20%20%20%20%20%20fill%3D%22rgba(255%2C255%2C255%2C0.92)%22%20filter%3D%22url(%23sh)%22%3E%F0%9F%94%A5%20%E6%98%9F%E5%85%81%E6%B4%BE%20F103%3C%2Ftext%3E%0A%20%20%3Ctext%20x%3D%22400%22%20y%3D%22176.2%22%20text-anchor%3D%22middle%22%0A%20%20%20%20%20%20font-family%3D%22system-ui%2Csans-serif%22%20font-size%3D%2256%22%20font-weight%3D%22700%22%0A%20%20%20%20%20%20fill%3D%22rgba(255%2C255%2C255%2C0.92)%22%20filter%3D%22url(%23sh)%22%3E%E5%8F%8C%E6%A0%B8%E5%BC%80%E5%8F%91%E6%9D%BF%E5%85%AC%E6%B5%8B%E9%80%89%E9%A2%98%EF%BC%9A%E9%82%80%E6%82%A8%3C%2Ftext%3E%0A%20%20%3Ctext%20x%3D%22400%22%20y%3D%22257.4%22%20text-anchor%3D%22middle%22%0A%20%20%20%20%20%20font-family%3D%22system-ui%2Csans-serif%22%20font-size%3D%2256%22%20font-weight%3D%22700%22%0A%20%20%20%20%20%20fill%3D%22rgba(255%2C255%2C255%2C0.92)%22%20filter%3D%22url(%23sh)%22%3E%E5%85%B1%E6%8E%A2%E5%8F%8C%E8%8A%AF%E4%B9%8B%E5%8A%9B%EF%BC%8C%E7%82%B9%E4%BA%AE%E6%97%A0%E9%99%90%E5%88%9B%3C%2Ftext%3E%0A%20%20%3Ctext%20x%3D%22400%22%20y%3D%22338.6%22%20text-anchor%3D%22middle%22%0A%20%20%20%20%20%20font-family%3D%22system-ui%2Csans-serif%22%20font-size%3D%2256%22%20font-weight%3D%22700%22%0A%20%20%20%20%20%20fill%3D%22rgba(255%2C255%2C255%2C0.92)%22%20filter%3D%22url(%23sh)%22%3E%E6%84%8F%EF%BC%81%F0%9F%94%A5%3C%2Ftext%3E%0A%3C%2Fsvg%3E)
%22%2F%3E%0A%20%20%20%20%3C%2Ffilter%3E%0A%20%20%3C%2Fdefs%3E%0A%20%20%3Crect%20width%3D%22800%22%20height%3D%22400%22%20fill%3D%22url(%23g)%22%2F%3E%0A%20%20%3Ctext%20x%3D%22400%22%20y%3D%2295.0%22%20text-anchor%3D%22middle%22%0A%20%20%20%20%20%20font-family%3D%22system-ui%2Csans-serif%22%20font-size%3D%2256%22%20font-weight%3D%22700%22%0A%20%20%20%20%20%20fill%3D%22rgba(255%2C255%2C255%2C0.92)%22%20filter%3D%22url(%23sh)%22%3E%E6%98%9F%E5%85%89%E5%8F%AC%E9%9B%86%E4%BB%A4%EF%BC%81%E6%88%90%E4%B8%BA%E6%98%9F%E5%85%81%E6%B4%BE%3C%2Ftext%3E%0A%20%20%3Ctext%20x%3D%22400%22%20y%3D%22176.2%22%20text-anchor%3D%22middle%22%0A%20%20%20%20%20%20font-family%3D%22system-ui%2Csans-serif%22%20font-size%3D%2256%22%20font-weight%3D%22700%22%0A%20%20%20%20%20%20fill%3D%22rgba(255%2C255%2C255%2C0.92)%22%20filter%3D%22url(%23sh)%22%3ENebula%20Pi%20F103%3C%2Ftext%3E%0A%20%20%3Ctext%20x%3D%22400%22%20y%3D%22257.4%22%20text-anchor%3D%22middle%22%0A%20%20%20%20%20%20font-family%3D%22system-ui%2Csans-serif%22%20font-size%3D%2256%22%20font-weight%3D%22700%22%0A%20%20%20%20%20%20fill%3D%22rgba(255%2C255%2C255%2C0.92)%22%20filter%3D%22url(%23sh)%22%3E%E9%A6%96%E6%89%B9%E4%BD%93%E9%AA%8C%E5%AE%98%EF%BC%8C%E7%A7%80%E5%87%BA%E4%BD%A0%E7%9A%84%E6%8A%80%E6%9C%AF%3C%2Ftext%3E%0A%20%20%3Ctext%20x%3D%22400%22%20y%3D%22338.6%22%20text-anchor%3D%22middle%22%0A%20%20%20%20%20%20font-family%3D%22system-ui%2Csans-serif%22%20font-size%3D%2256%22%20font-weight%3D%22700%22%0A%20%20%20%20%20%20fill%3D%22rgba(255%2C255%2C255%2C0.92)%22%20filter%3D%22url(%23sh)%22%3E%E6%89%8D%E5%8D%8E%EF%BC%81%3C%2Ftext%3E%0A%3C%2Fsvg%3E)